


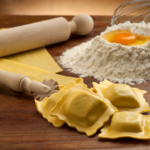
Making pasta from scratch is a unique experience that can help you truly appreciate the art and effort that goes into creating those gourmet pasta dishes you love downtown. While many people use pasta-making machines, what if you don’t have one on hand? How can you roll your own pasta and create various shapes? Keep reading to find out.
How to Make the Dough
Making homemade pasta dough is simple. Here’s an easy pasta dough recipe to get you started:
Ingredients You’ll Need:
- 2 cups of all-purpose flour
- 3 large eggs
- A pinch of salt
Steps to Follow:
- Start by pouring your flour onto a clean surface and make a little well in the middle.
- Sprinkle your pinch of salt over the flour.
- Crack your eggs and drop them into the well you made in the flour.
- Use a fork to gently beat the eggs, gradually bringing in flour from the sides of the well. Keep mixing until the dough starts to come together.
- Once your dough is roughly mixed, it’s time to get your hands in there! Knead the dough for about 8-10 minutes, until it’s smooth and elastic. If the dough is too sticky, add a little more flour.
- Wrap your egg pasta dough in cling film or plastic wrap, and let it rest for about 30 minutes at room temperature.
How to Make Different Pasta Shapes
Now that you’ve got your pasta dough ready, it’s time to shape it. Here’s how you can do it with just your hands and a few simple tools.
1) Fettuccine or Tagliatelle
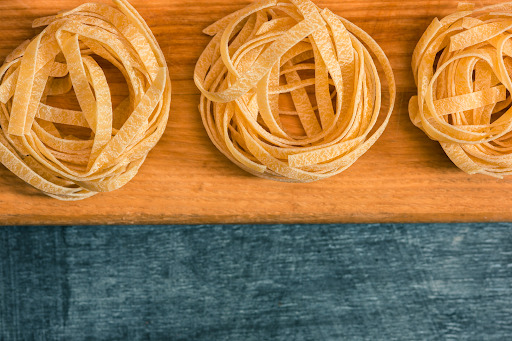
- Lightly flour your surface. This could be a kitchen counter or a cutting board.
- Roll out your fresh pasta dough with a rolling pin. Begin from the center and roll towards the outer edge. Your rolled-out dough should be nice and thin.
- Once it’s rolled out, loosely roll the dough up like a scroll.
- Use a sharp knife to cut the rolled dough into strips. The width can vary depending on whether you prefer fettuccine (1/4 inch) or tagliatelle (1/2 inch).
- Unroll the strips and twirl the pasta into little nests. Don’t forget to sprinkle them generously with salt to prevent any sticking.
2) Farfalle (Bow-Tie Pasta)
- Sprinkle some flour on your work surface.
- Use a rolling pin to roll out your pasta dough into a thin sheet, about as thin as a dime. Try to keep it as even as possible.
- Take your knife and cut the dough into small rectangles. Each rectangle should measure about 1 inch by 1.5 inches in size.
- Pick up a rectangle and hold it with the longer sides at the top and bottom.
- Gently pinch the middle of the rectangle, bringing the top and bottom edges together in the center.
- Apply enough pressure to make the pinch stick but be careful not to tear the dough.
- Repeat this process with the rest of your dough rectangles. If you find the dough sticking to your fingers, dust them lightly with flour.
3) Ravioli
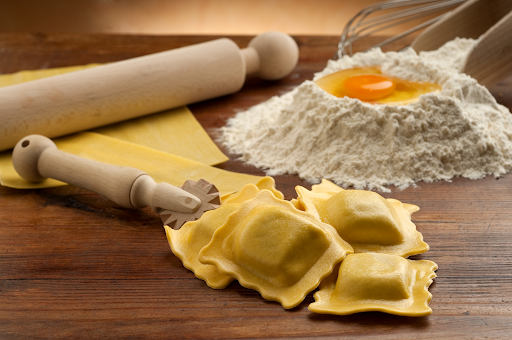
- Roll your dough out thinly and cut it into two equal-sized sheets.
- On one sheet of dough, place small scoops of your chosen filling (cheese, spinach, meat, etc.) with a bit of olive oil. Space them out evenly, leaving about an inch between each scoop.
- Lay the second sheet of dough on top and press down around the filling to seal it.
- With a knife or pastry cutter, cut between the filling mounds to create individual ravioli squares. To make sure your ravioli doesn’t open up while cooking, press the edges with a fork.
4) Orecchiette
- Take a small piece of dough and roll it into a thin rope, about the thickness of a pencil.
- Using a knife, cut the rope into small pieces, about 1/2 inch long.
- To shape each piece, press your thumb into the center of the dough piece and drag it a little bit towards you. If the dough sticks to your thumb, dust it with a bit of flour.
- After dragging with your thumb, you can gently turn each piece inside out over your thumb or finger to create a more pronounced bowl shape.
- Place the shaped orecchiette on a lightly floured surface or a clean kitchen towel. Let them sit for a bit to dry slightly. This helps them maintain their shape when cooked.
5) Cavatelli
- Take a small portion of the dough and roll it out into a long rope. It should be about the thickness of your finger.
- Use a knife to cut the rope into small pieces, roughly 1 inch long.
- To shape each piece, press it lightly against the surface with two fingers and roll it towards you. The idea is to create a small, ridged shell shape with a hollow inside.
- You can use a gnocchi board or the back of a fork to add ridges to each piece, but this is optional.
- Once shaped, lay your cavatelli out on a lightly floured surface or a clean kitchen towel. Let them dry for a bit.
How to Dry Your Homemade Pasta?
Drying your pasta is a key step, especially if you’re not planning to cook it right away. Here’s how to do it:
- Air-Dry Method: Spread your pasta shapes out on a baking sheet lined with parchment paper. Make sure they’re not touching each other. Let them sit in a dry, well-ventilated area for about an hour.
- Hanging Method: If you’ve made long noodles, you can hang them over a pasta drying rack or even a clean clothes hanger. Just drape the noodles over the rack and let them air dry for about an hour.
- Fully Dry for Storage: If you want to store homemade fresh pasta pasta, let it dry completely. This can take up to 24 hours, depending on the humidity and temperature.
How Long Does it Take to Cook Fresh Pasta?
Since it’s fresh, homemade pasta cooks much quicker than store-bought dried pasta. It generally only takes 2-4 minutes in boiling, salted water but this might vary based on how thick the pasta is. The best way to tell if it’s done is to taste a piece. It should be soft but still a bit chewy (al dente).
How to Store Homemade Pasta?
If you have any remaining dough or if you’re not going to cook your pasta right away, here are some ways you can store it:
- Refrigerate Pasta Dough: If you plan to cook your pasta within a few days, dust it lightly with flour, let it dry as mentioned above, and then store it in an airtight container in the refrigerator. It will last for 2-3 days.
- Freeze: You can freeze your pasta for longer storage. Place the dried pasta on a baking sheet, freeze it for a couple of hours, and then transfer it to a freezer bag or container. It can be stored in the freezer for up to a month. When you’re ready to cook, just boil it directly from frozen – no need to thaw.
- Dry Storage: You can also dry your pasta completely for longer shelf storage. This process can take up to 24-48 hours, depending on the thickness of the pasta. Once fully dry, store it in an airtight container in a cool, dry place. It can last for several weeks this way.
Summary
And there you have it! A variety of pasta shapes without a pasta machine. Remember, it’s not about perfection; it’s about having fun in the kitchen and creating something delicious with your own hands.
And, if you ever want to take your homemade pasta recipe to the next level, check out the Misterchef Pasta Maker. This handy tool lets you cook homemade pasta quickly and effortlessly roll out your dough to the perfect thickness. Shop with us today!