


A sandwich maker is a handy kitchen gadget that can help you create mouthwatering sandwiches, hot melts, and more, in a matter of minutes. It’s a must-have if you have a tight schedule or simply love the crunch of a perfectly toasted sandwich. But how do you use one? In this easy-to-follow guide, we’ll walk you through the steps of using a sandwich maker, from start to finish.
What Are Sandwich Makers and How Do They Work?
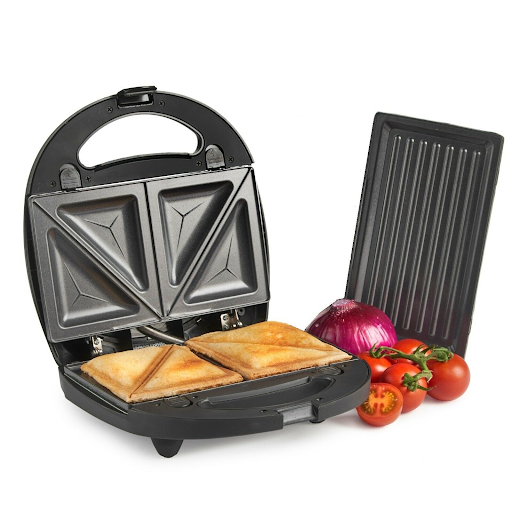
Sandwich makers, also known as sandwich grills or presses, are handy kitchen appliances used to make delicious toasted sandwiches. They have two non-stick heating plates, one on top and one on the bottom. When you place your sandwich between these plates and close the device, it applies even pressure and cooks it.
There are various types of sandwich makers:
- Basic Grill Sandwich Maker: This is the classic model designed primarily for making grilled cheese sandwiches and simple toasted sandwiches. Most sandwich makers like this have a flat, smooth plate on the top and bottom.
- Panini Press: A panini press is designed with ridged plates that add grill marks to your sandwiches. It’s excellent for making paninis, as well as sandwiches with thicker fillings.
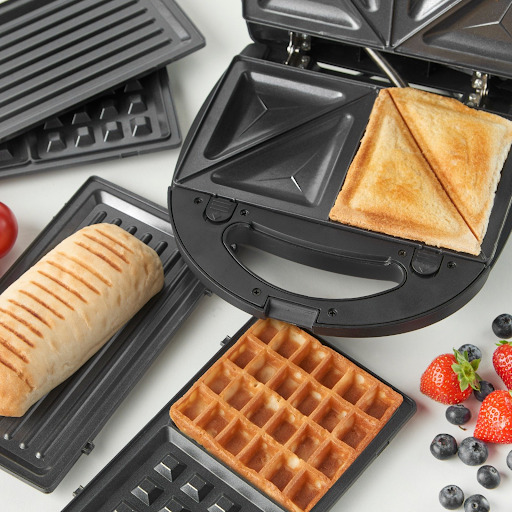
- Waffle Iron Combo: Some sandwich makers come with interchangeable plates, allowing you to make waffles and sandwiches using the same appliance.
- Multi-Function Grills: These versatile machines can be used for sandwiches and grilling meat, vegetables, and more. They often have adjustable temperature settings.
- Deep-Fill Sandwich Makers: These sandwich makers have deeper plates, making them perfect for stuffed or extra-thick sandwiches.
How to Use a Sandwich Maker: A Simple Step-by-Step Guide
Using a sandwich maker is super easy. Here’s a simple guide:
Step 1: Preheat the Sandwich Maker
Plug in your sandwich maker and let it preheat. Most models have indicator lights that’ll tell you when it’s ready. This usually takes a few minutes.
Step 2: Prepare Your Sandwich
While the sandwich toaster is heating up, assemble your sandwich. Place your favorite fillings, like veggies, cheese, and meat, between two slices of bread. You can also add condiments if you like.
Step 3: Lightly Grease the Sandwich Maker Plates
To prevent your sandwich from sticking to the plates, you can lightly grease them with cooking spray or a small amount of butter.
Step 4: Place Your Sandwich Inside
Gently open the sandwich maker and place your prepared sandwich onto the bottom heating plate. Make sure it’s centered so that it cooks evenly.
Step 5: Cook Your Sandwich
Now, just wait for your sandwich to cook. This usually takes 3-5 minutes, but it can vary depending on your sandwich maker and how crispy you like your sandwich.
Step 6: Check for Doneness
Peek inside to see if your sandwich is golden brown and crispy. If it’s not quite there, close the lid and give it a little more time.
Step 7: Remove Your Sandwich
When your sandwich is ready, carefully open the sandwich maker and use a silicone spatula to take it out.
Step 8: Let It Cool
Your sandwich will be super hot, so let it cool for a minute or two before digging in. Enjoy!
Additional Tips for Making Delicious Sandwiches
Want to take your sandwich game to the next level? Here are some handy tips to make your sandwiches even more delicious:
1) Choose the Right Bread
The bread you pick can make or break your sandwich. If you’re making a classic grilled cheese sandwich, regular sliced bread is usually the best choice. If you’re making a sandwich with a lot of filling, studier breads like whole wheat, sourdough, or even a baguette work well.
2) Butter the Outside
For that extra crispy and golden touch, spread a thin layer of butter on the outside of your bread slices before toasting them. This adds a rich flavor and a delicious crunch.
3) Don’t Overfill
Overloading your sandwich with fillings can lead to a messy experience. Stick to a reasonable amount to make sure it’s easy to eat and holds together.
4) Layer It Correctly
The order of your ingredients matters. Start with the heavier items like cheese and meats closest to the bread to help hold everything together. Lighter items like lettuce and tomato go on top.
How To Use Your Sandwich Maker for More Than Just Sandwiches?
Your trusty sandwich maker can do more than just make sandwiches – it’s an all-in-one kitchen tool that can whip up a variety of delicious dishes. Here’s how to make the most of it:
1) Grilled Quesadillas
- Place a tortilla on the bottom plate of your sandwich press.
- Add your favorite fillings like cheese, cooked chicken, and veggies.
- Top it with another tortilla and close the lid.
- Wait a few minutes, and you’ll have perfectly melted, crispy quesadillas.
2) French Toast or Pancakes
- Lightly grease the plates with butter or oil.
- Dip slices of bread or pour pancake batter onto the plates.
- Close the lid and cook until they’re browned to your liking.
3) Omelets
- Beat eggs in a bowl and add your favorite omelet ingredients like cheese, ham, and veggies.
- Pour the mixture onto the bottom plate.
- Close the lid and cook until it’s set.
4) Grilled Wraps
- Take a large tortilla and lay it flat.
- Add your preferred fillings, like sliced turkey, a beaten egg, cheese, and spinach.
- Fold the sides of the tortilla over your fillings, then roll it up.
- Place the wrap seam-side down in the sandwich maker and cook until it’s golden and crispy.
5) Fruit-filled Pastries
- Roll out some puff pastry dough and cut it into squares.
- Add fruit preserves or fresh fruit in the center.
- Fold the squares in half, creating triangles, and seal the edges.
- Cook until the pastry is golden and the filling is warm.
How to Clean Your Sandwich Maker?
After creating delicious treats with your sandwich maker, it’s important to give it a little TLC. Here’s how to do it:
- Make sure your sandwich maker is disconnected and has cooled down.
- Carefully open your sandwich maker and gently shake it over the sink or a trash can to remove any loose crumbs or food bits.
- Take a damp sponge or cloth (not soaking wet) and wipe down the non-stick plates and exterior of the sandwich maker. This will help remove any remaining residue.
- Remove any removable plates from your sandwich maker and give them a wash in warm, soapy water. Before putting them back, make sure they are dry.
- For stubborn stains or stuck-on food, make a paste by combining a small amount of baking soda and water. After applying it to the affected region and letting it sit for a few minutes, use a soft brush or cloth to gently scrub it off.
- Once you’ve finished cleaning, ensure that everything is completely dry before plugging it back in or storing it away.
Note: Do not immerse your entire sandwich maker in water or expose it to liquids, as this can lead to damage to its electronic components.
Summary
Using a sandwich maker is a simple and efficient way to create a variety of tasty sandwiches. You’ll soon become a sandwich-making pro by following this step-by-step guide and practicing a bit.
And if you’re looking for a high-quality sandwich maker to improve your sandwich-making experience, consider the Misterchef Sandwich Maker. With its user-friendly design and exceptional performance, it’s the perfect kitchen tool for creating the best cheese sandwiches effortlessly. Shop with us today.