


Sipping a cappuccino or latte at your favorite cafe is always a treat, especially because of the creamy foam on top. But what if you could create that same café-quality froth at home? Good news – it’s absolutely doable with a milk frother. In this guide, we’ll explore different kinds of milk frothers and provide practical tips to help you make that perfect foam right in your kitchen. Let’s dive in!
What Is a Milk Frother?
A milk frother is a kitchen tool used to froth milk and create foam for coffee drinks such as lattes, cappuccinos, and more. It works by rapidly agitating milk, introducing air into it, which results in a light and creamy texture. Below are the different types of milk frothers:
Handheld Frothers
These are battery-powered gadgets that have a small whisk-like attachment. You might recognize them from the Dalgona coffee trend. To use them, you need to simply dip the whisk into warm milk and turn it on. The rapid spinning creates foam quickly. They are affordable, easy to store, and simple to use.
Manual Pump Frothers
These frothers resemble a French press. You pour warm milk into the carafe or the milk jug, then manually pump the plunger. The pumping action froths the milk. They are great for those who prefer a bit of physical activity in their coffee-making process.
Electric Milk Frothers
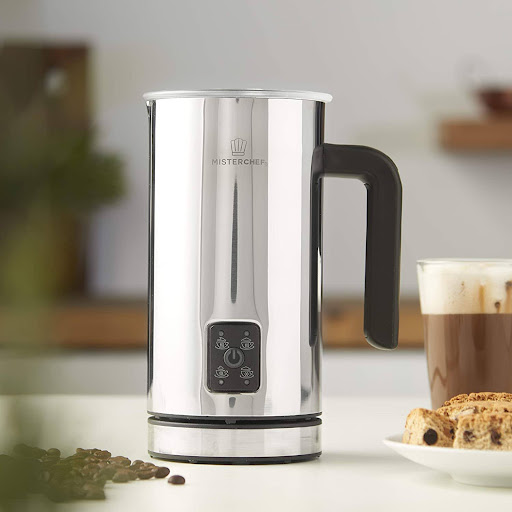
These are the most advanced types of milk frothers. To use it, you need to pour milk into the frother, and with the press of a button, it heats and froths automatically. Some models like MisterChef’s Milk Frother allow you to control the temperature and the froth consistency. It is ideal for convenience and consistent results.
How to Use a Handheld Milk Frother
- Start by pouring your choice of milk into a tall container. Make sure to fill it only halfway to allow space for the foam to expand.
- Place the whisk end of the handheld frother into the milk. Make sure it’s fully submerged to avoid splashing.
- Turn on the frother. Keep it near the bottom of the container, then slowly move it upwards as the milk begins to foam.
- Keep the frother running until you achieve your desired level of foam. This usually takes about 15-30 seconds. For thicker foam, froth a bit longer.
How to Use a Manual Pump Frother
- Pour the milk into the frother’s carafe. Fill it to about half or a third.
- Place the lid with the pump attached to the carafe. Secure it tightly. Then, use the handle to pump up and down vigorously.
- Keep pumping for about 10-20 seconds.
- Once done, let the frothed milk sit for a few seconds.
How to Use an Electric Milk Frother
- Start by pouring milk into the electric frother’s jug. Most models have an indicator line to show the maximum fill level.
- Some electric frothers come with multiple settings for temperature and froth density. Choose your preferred settings if your model offers these options.
- Secure the lid and press the start button. The frother will heat and froth the milk automatically. This process typically takes between 1-2 minutes.
- The frother will stop automatically once it has reached the set temperature and milk froth level.
What Kind of Milk Should You Use With a Frother?
Choosing the right milk for frothing is key to achieving the ideal flavor and texture in your coffee drink. Here’s a guide to help you pick:
- Whole Dairy Milk: Whole milk is the top choice for frothing due to its high-fat content. It produces a rich, creamy foam which is perfect for cappuccinos or lattes.
- Low-Fat or Skim Milk: Low-fat or skim milk also froths well and creates a decent volume of foam. Compared to whole milk, the texture will be lighter and less creamy, but it’s still an excellent option for anyone watching their calorie consumption.
- Plant-Based Milk: Non-dairy milk like oat, soy, or almond milk can also be frothed, but the results vary. Soy milk often works best, creating a foam similar to cow’s milk. Oat milk is also becoming popular for its ability to form a creamy texture. Lastly, almond milk may not froth as well but still offers a nice flavor.
Should You Choose Hot or Cold Milk for Frothing?

It is generally recommended to start with cold milk since it froths more easily and is more stable. This is because the proteins in cold milk are more reactive to being whipped into foam. For most milk frothers, including electric and handheld ones, your best bet is to grab milk straight from the fridge.
On the flip side, hot milk doesn’t work as well. It won’t give you as much foam, and may not hold up as nicely. If you prefer your milk warm, the trick is to froth it while it’s cold, and then warm it up afterward – either in the microwave or on the stove. Just keep an eye on it and avoid boiling the milk, as this can impact taste and quality.
Why Should You Froth Milk?
Firstly, it makes your coffee look better, especially when you’re trying to create simple latte art. A prettier coffee is always a bonus!
Secondly, frothed milk adds a sense of lightness to your coffee and helps tone down its strong, bitter taste. It works especially well for drinks like lattes, cappuccinos, espressos, and macchiatos. Regular coffee with plain milk can feel a bit heavy on the palate.
Additional Tips for Frothing Milk
For the perfect frothy coffee, check out these extra tips:
- If you’re heating milk, aim for a temperature between 60-65°C (140-150°F). Overheating can spoil the taste and foam quality. You can heat milk either over the stovetop or the microwave.
- If you’re using different kinds of milk (like dairy and non-dairy), either use separate frothers or give them a good cleaning between uses to maintain the distinct flavors.
- For different drinks, adjust the froth density. Less froth for flat whites, and more for cappuccinos.
- After frothing, wait around 30 seconds. This lets the bubbles settle and blend, giving you that creamy texture.
- Frothing too much can make the milk too stiff and hard to pour. Stop frothing when you see the milk has doubled in volume.
How to Foam Milk Without a Milk Frother
You don’t need a fancy milk frother to foam milk. Here’s how you can do it with everyday tools:
1) Using a Jar
Fill a jar halfway with milk, close the lid tightly, and shake it vigorously for about 30-60 seconds. The milk should double in volume and create foam. To stabilize the foam, microwave the jar without the lid for about 30 seconds. Be careful when removing the jar as it will be hot.
2) Whisk Method
Heat the milk on the stove or in the microwave, but don’t let it boil. Use a whisk to whip the milk until it’s frothy. Although this requires some elbow grease, it works well. You can also use an electric mixer set on low speed.
3) French Press
If you have a French press, you can use it similarly to a manual pump frother. Pour warm milk into the press, no more than halfway. Pump the plunger up and down vigorously until the milk is frothy.
4) Espresso Machine
If you have an espresso machine with a steam wand, you can use it to create professional-grade froth. Begin by filling a metal pitcher with cold milk about halfway. Submerge the tip of the steam wand just below the milk’s surface and turn it on. Keep the wand near the surface to incorporate air into the milk, creating foam. Then, lower the pitcher so the wand is deeper in the milk to heat it up. Finally, swirl the milk in the pitcher to evenly mix the foam before pouring.
Summary
By following these simple guidelines, you’ll be making frothy milk like a pro in no time. Experiment with different milk types and beverages to find your perfect froth, and don’t forget to clean your frother after each use for the best results.
Looking to upgrade your frothing experience? Check out the MisterChef Electric Milk Frother. With our user-friendly design and 4 setting options, it’s the perfect tool for creating silky smooth, cafe-quality foam in your own kitchen. Shop with us today.