


Making butter at home might sound like something straight out of the past, but if you have a stand mixer, it’s easier than you think. I mean who wouldn’t want fresh, creamy butter that you made yourself to spread on warm bread or melt over your favorite veggies? And the best part? You need just one ingredient. So, if you’ve ever wondered what it’s like to churn your own butter, here’s how to do it.
What You’ll Need
- 2 cups of heavy cream (35-40% fat). Avoid using light cream, raw milk, raw cream or half-and-half, as they won’t have enough fat to turn into butter.
- Salt (optional)
- Stand mixer with a whisk attachment
- Fine mesh strainer or cheese cloth
- Cold water
How to Make Butter With a Stand Mixer
Here’s a step-by-step guide on how to make butter with a stand mixer:
Step 1: Pour the Cream into the Mixer
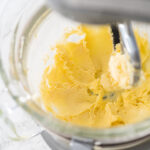
Pour the heavy cream into the mixing bowl. If you prefer salted butter, add the salt as well. Start with 1/4 teaspoon of salt for every 2 cups of cream. Fill the bowl only halfway. Attach the whisk attachment. Start the mixer on a low speed and slowly increase it to a medium-high speed. The cream will first turn into heavy whipping cream, but continue mixing until it passes this stage.
Step 2: Let the Butter and Buttermilk Separate
As the mixer keeps running, the whipped cream will become stiffer and stiffer. Soon, you’ll see it start to separate. The liquid part (which is buttermilk) will separate from the solid part (which is the butter). This usually takes about 5-10 minutes.
Step 3: Strain the Buttermilk
Once the butter and buttermilk have separated, stop the mixer. You’ll see a pool of liquid buttermilk at the bottom of the bowl and chunks of butter floating around. Grab your fine-mesh strainer or cheesecloth and pour the mixture through it into another bowl. The buttermilk will drain away, leaving you with just the butter. Save the buttermilk for baking or other uses.
Step 4: Wash the Butter
Now, it’s time to wash the butter solids. This helps remove any remaining buttermilk, which can make your butter spoil faster. To do this, place the butter back in the stand mixer bowl and pour in some cold water. Start the mixer again on a low speed, letting the butter slosh around in the water. The water will turn cloudy as it pulls out more buttermilk. Drain the water and repeat this process until the water runs clear. You’ll need to do this for 2-3 washes.
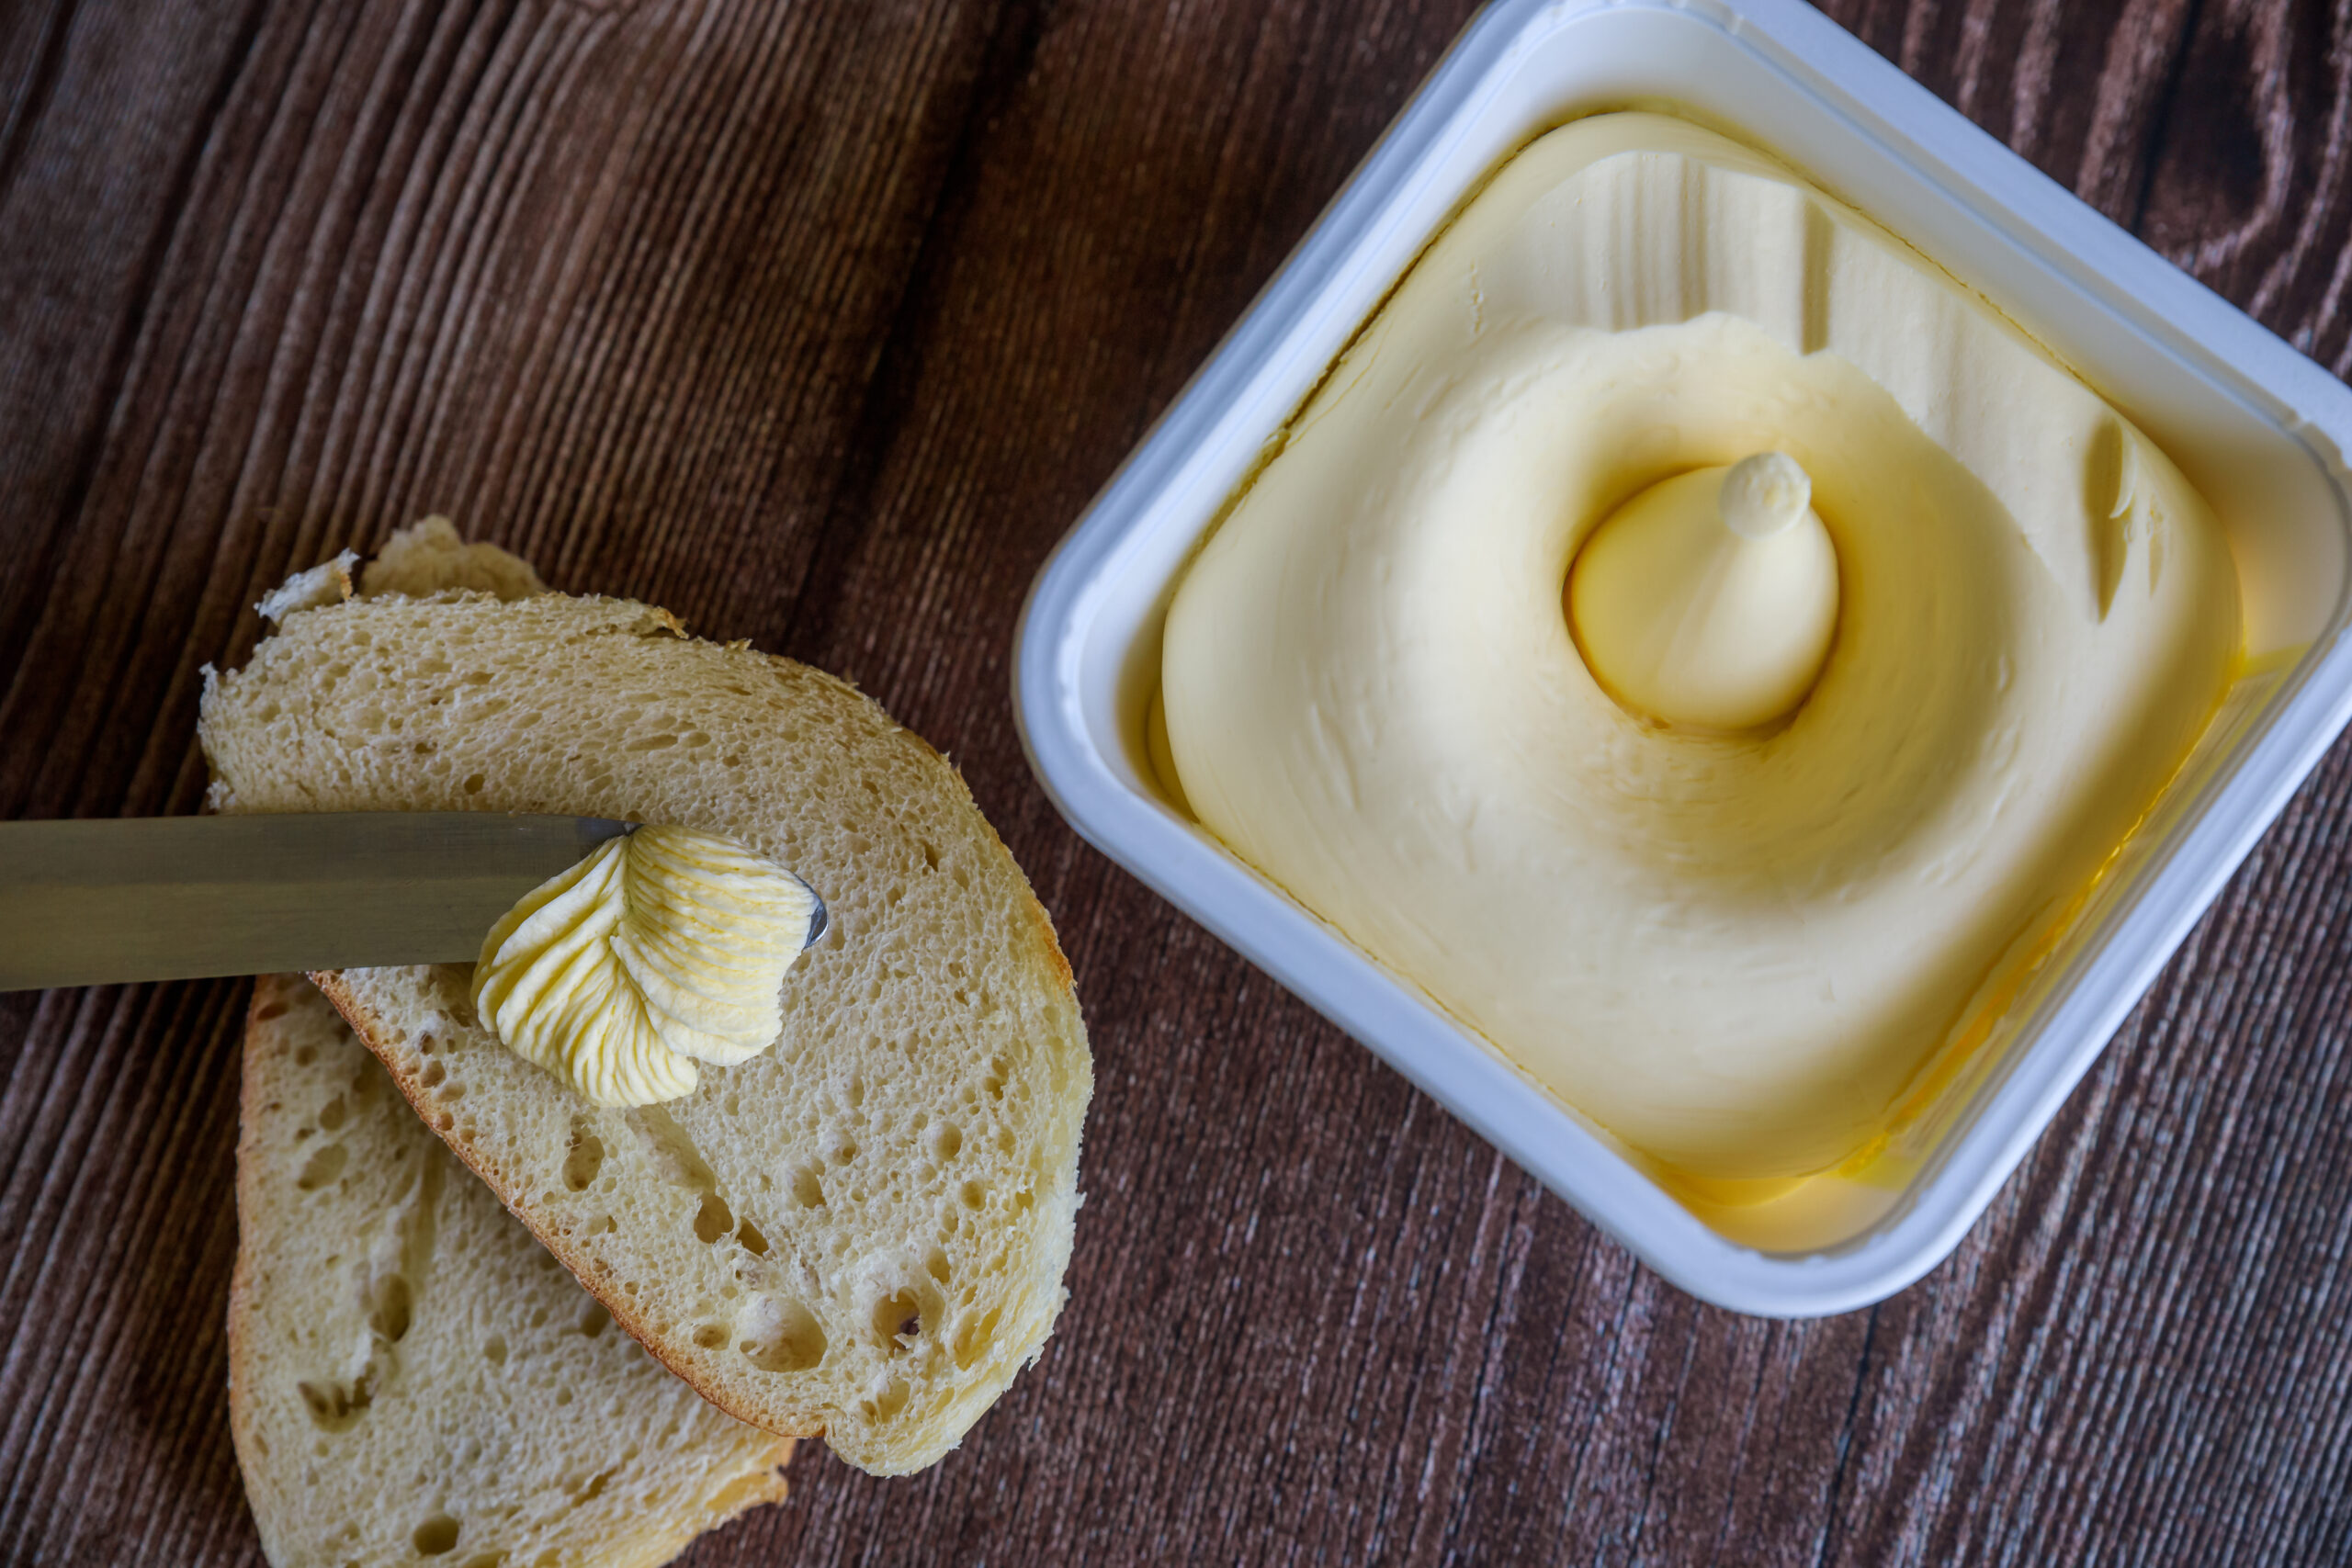
Step 5: Shape and Store the Butter
After washing, remove the butter from the bowl and shape it as you like. You can use a spatula or your hands to form it into a log, or ball, or just leave it as is. If you used salt, this is a good time to knead it into the butter to ensure it’s evenly distributed. Once shaped, wrap the butter in parchment paper or place it in an airtight container. Store it in the refrigerator for up to 2 weeks or freeze it for longer storage.
Step 6: Enjoy Your Homemade Butter
And that’s it! You’ve just made your own butter from scratch. Spread it on toast, melt it over popcorn, or use it in your favorite recipes. It’s richer and creamier than store-bought butter, and you made it all yourself!
How to Make Non-Dairy Butter
For this recipe, you’ll need:
- Refined coconut oil
- Olive oil
- Non-dairy milk like soy or almond milk.
- Soy or sunflower lecithin (You’ll find these at health food stores).
- Apple cider vinegar or lemon juice
- Salt
- Stand mixer or blender
- Ice cube tray or small mold
Once you’ve got all your ingredients, follow these steps:
- Start by melting your coconut oil. You can do this in a small saucepan over low heat or in the microwave. Make sure it’s fully melted but not boiling hot.
- Pour the melted coconut oil into your blender, followed by the olive oil (or another liquid oil you’re using), non-dairy milk, a small splash of apple cider vinegar or lemon juice, and a pinch of salt. If you’re using lecithin, add that too.
- Blend everything together until the mixture is completely smooth and creamy. This might take a minute or two, depending on your blender. The mixture should look like thick, creamy liquid without any lumps.
- Pour the mixture into your ice cube tray or small mold. This will give your butter a nice, manageable shape. You can also pour it into a small dish if you prefer. Pop the tray or mold into the fridge and let it chill for a few hours, or until the butter is fully solidified.
- Once the butter is set, pop it out of the mold or tray and store it in an airtight container in the fridge. Your non-dairy butter should last for a couple of weeks.
Useful Tips
- If your kitchen is warm, pop the mixer bowl in the fridge for a bit before starting. This helps the butter form faster.
- Mix in some fresh herbs or spices for flavored butter—garlic, rosemary, or even a bit of honey works great.
- Let your cream sit out for 10-15 minutes before starting and let it come to room temperature. It helps the cream whip up more smoothly.
FAQs
What if my butter turns out too soft?
Just pop it in the fridge for a bit. It’ll firm up quickly and be ready to use.
Is it okay if my butter has a slightly sour smell?
A slight tangy smell is normal, especially if your cream was cultured or slightly aged. However, if it smells off or sour like spoiled milk, it’s better to start over with fresh cream.
Why is my butter not separating from the buttermilk?
If your butter isn’t separating, it might be because the cream wasn’t whipped long enough or the fat content was too low. Try using cream with a higher fat content, and keep whipping until you see the separation happen.
How much butter will I get from one cup of cream?
Typically, you’ll get about half a cup of butter from one cup of heavy cream.
Summary
The butter making process is surprisingly easy. With just one ingredient and a little bit of time, you can enjoy fresh, homemade butter that’s richer and creamier than anything you’ll find in a store. Plus, you get the added bonus of delicious buttermilk for baking.
Looking for the perfect tool to make your cooking easier? Check out the MisterChef Stand Mixer. With its powerful motor and versatile attachments, whipping up homemade butter, dough, or anything else is a breeze. Shop with us today.